Showing posts with label butterflies. Show all posts

Wednesday, December 2, 2015

Art journal pages for DLP

 My intention to blog weekly went a little astray last week. Our main computer died suddenly even though it is a SSD drive that is supposed to be extremely reliable. The computer guy who built it said it was the first time he had seen a broken one in 20 years of working. We were just unlucky I guess. Fortunately I have the backup set up to run weekly so we only lost a few documents and none of our photos. It did take a long time to download all our programs again and set them up the way I like. If you haven't done a back up recently I urge you to do one soon.

 Now that I am back I will share some more journal pages. These are more of the Documented Life Project pages.


The challenge for this page was silhouettes and the prompt was "no shadow without the light". I used a credit card to scrape paint across the page for the background then used a stencil to do the flowers silhouette. I used a marker to fill in the lines of the stencil so it was a solid shape.


The art challenge here was to use deli paper. It is a very thin tissue paper with a waxy feel on one side. The waxy side is actually a thin coat of plastic. You can paint on either side but sometimes the paint comes off the waxy side. I used some monoprints I had done previously and just added the quote. It was a very quick page.


The challenge for this one was to use vellum and the prompt was "Sheer genius". I drew the big butterfly on vellum with a permanent marker then all the little ones too. I colored it in on the back using water-based markers so the colors are a little muted. I stitched the vellum butterfly onto white paper, I cut it out and glued it to the page. The page looked a little bare so I added the border as  finishing touch.

Sometimes I surprise myself with the ideas that pop into my head when I find a quote like this one. I would never have dreamed I could do this sort of page a few years ago.

I will probably share a some of the textiles I have been playing with next week so I hope to connect with you then. 

Tuesday, November 3, 2015

A new journal page.

Today I am sharing a journal page I did for the Documented Life Project. The art challenge was to use tissue paper and the prompt was 'disappearing trick'.

I found a quote that I liked so that inspired me to do a flower garden. I searched through my stash of printed tissue paper but couldn't find any nice flowers that I wanted to use so I looked through my napkin collection (every art stash hoarding journaler has one, don't they?). I chose a few different napkins and tore the flowers out. I did trim around some of the flowers with scissors.

I first painted my page with white gesso then sprayed on colour with the dylusions spray. When it was all dry I arranged my flower cut outs to look like a garden bed.  I used matte medium to glue down the napkins and left it to dry.

 Uh oh. I knew that the napkins would become transparent when glued down but I didn't expect the dylusions spray that was mixed with the gesso to become bright green and change the flower colours. It was difficult to make out the flowers now so I decided to colour over everything with my prismacolor pencils. I was hoping the creamy wax pencils would cover up a lot of that green and also make the flowers more prominent. I also added some extra leaves in the blank areas and extended the flower stems so they reached the bottom of the page. It was a lot of fun to colour this way. Now I am happy that the page looks the way I imagined. 

 I will share some of my other pages and art I have been working on soon. I am planning to update my blog on Tuesdays from now on so that it forces me to be more regular about updating. I may even add extra posts in between but don't hold me to that.

Sunday, August 16, 2015

Index Cards galore.

I have been a little slack updating my blog lately. I think I am trying to do too much and it is making me freeze and not do anything. I take on lots of new projects and then get lost not knowing what I should do. I am deciding what is important to me and letting other things go but it is hard for me because once I start a project or challenge I like to finish.

week 9
  I did the Index Card a day challenge again this year. It will probably be the last year for me. Why? I just didn't find it interesting this year and so it will be one of the challenges I will stop doing.  Well...maybe stop doing because I may change my mind next June, lol. I would normally follow peoples links to their pages from the facebook group but as links were banned this year I couldn't connect with other artists like I did previously. It took a lot of the inspiration and discovery away for me and made it seem less fun because I didn't feel the need to check the facebook group as often.

week 1 periodic table
 I did enjoy making my cards and have prepped a few extras so that when the mood takes me I have a quick little card to do to get me in the mood for larger art pieces. I was going to do my own thing this year but when the first week of prompts were listed I was inspired to give them a go. As the challenge went on the prompts did not always appeal so I did my own art then. 

I have only shown a few of the cards here. I have loaded all 61 cards onto my flickr page so if you want to see the other cards they can be found here: https://www.flickr.com/photos/artygirl/


 Week 1 was drawing and this is a plan of our garden.


Week 2 was paint and all the prompts were colors so I did abstract doodles most of the week.


Week 3 was collage. This was route 66 in my town. 


 Week 4 was patterns. This prompt was exotic.


Another week 4 prompt - dramatic


Week 5 was mark making using stamps, tape and stickers. I didn't follow prompts this week. I used washi tape on all the backgrounds and stamped on them. I then colored and added details with acrylic paint markers. These cards were a lot of fun and something I will do again. 


Week 6 was to use a different color each day. I did a collage of similar colored pictures each day and doodled to fill in blank spots on each card. I really enjoyed this technique as well and got to use some of those random images I have been saving. 


 Week 7 was typography. I did follow the prompts again this week.


Week 8 - maps. I followed prompts this week so I could use the maps in various ways. 


 The last week was meant to be sketching but I found these picture cards in my stash and wanted to use them so I doodled backgrounds to match the photo colours. 

I enjoyed my time making cards this year but the fun of the facebook group seemed to be different this year...maybe because it has become so large. Or more likely because I didn't have time to keep up with the posts this year. I am thankful that Tammie hosts the challenge each year but it may be time for me to do something different next year. 

Monday, March 23, 2015

Lots of exciting new things...

I have been very busy lately trying new art techniques. I love to keep learning new things and experimenting whenever I can.

First I will share the little demo piece I made for my technique book using the rusty materials that I made with the textile group. I tried to use some of each fabric that I had colored with rust and dye. I added some hand stitching with the rusted threads I made (I had saved the cotton string that I wrapped the rusting objects with) and a little bit of green thread.


 Next I am sharing my week 9 DLP pages. The left is my writing exercise for this week, using journaling boxes and filling them with words. I like the way this looks and will use it in the future. The page on the right is a technique I learned from 21 secrets a couple of years ago and fun to do. It is a bit of doodling but not excessive so I didn't get bored with it. A few people mentioned this would make a great quilt and I can see it as a fabric wall hanging or something. I may use a version of it soon.


 This page is my watercolors for March which is summer time here. Simple sketches and watercolors.

After this I spent a lot of time experimenting with a new textile technique I learned with my group. It is sun painting and was a lot of fun. I will share the details and examples next time I blog.


The final piece I am sharing is from an art workshop I did over the weekend. It was with David Wells who is a master pastel artist. His portraits are incredibly realistic but very captivating too. I have not properly used pastels before (only played with pan pastels a bit) so it was new for me. It was also my first realistic portrait. I am pleased with the way it came out and although I can see where I need to improve I had a really fun time. David was very sharing with his knowledge and encouraging to all.


 Best of all I really liked using the pastels. In the past when I have tried them I didn't see the possibilities of this medium but now my eyes have been opened. I may even like them more than painting because I love not having to clean up paint and paint brushes. When I finished for the day I just put the pastel down and walked out of the studio. I have broken my self imposed embargo on buying new art supplies and ordered a whole bunch of new products to continue with the pastels. My heart is fickle when it comes to any form of art....I love them all.

Thursday, February 12, 2015

Layers of Paint

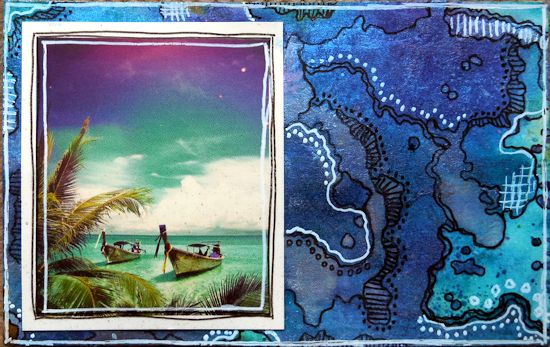
This month on the Documented Life Project it is all about layers. I didn't want to do another collage type page so I decided to try to think of a way to do paint layers.


 I used my Cuttlebug machine to cut out a whole field of flowers from some post it notes. The Post-its I used have sticky stuff across the whole page (not just the top edge) so when I stuck them down they would stay. I was able to cut through 5 layers of Post-it notes at a time with the machine. I used the flowers, leaves and a couple of butterflies. It took about 5 minutes but you could draw and cut out if you had another idea.Some other objects that would look great would be a flock of birds, butterflies, dragonflies, hearts, circles or squares for an abstract look.


  I wanted to use transparent paints so that each color is changed by the color underneath it. I started with the lightest and worked along. Oops, just realized the blues are in the wrong order. I used the manganese blue before the phthalo blue.


I masked off a border that would stay white because I like the way it looks and it stops the paint going onto other pages.  I stuck a few flowers and things down. These will be white at the end so I didn't do too many. I went over the whole lot with the lightest yellow keeping it very pale at the top of the page because I don't want to make the sky too green. I let it dry.


 I added a few more of the cut outs and went over the bottom half of the page with the medium yellow. Again I let it dry. This is important because if it is not dry the post-its might come off and you risk lifting off some of your first layers of paint.


I started to get into my painting about this time and forgot to take a photo of the first couple of blue layers. The manganese blue didn't cover very well so I did two layers of that over the whole page (making the sky color), then added more flowers and some of the leaves. This photo was taken after the first layer of phthalo blue was done. 


I did a second layer of the phthalo blue to make the background a bit darker. I let it dry. A quick note about composition here: as you add the flowers allow them to overlap and also go off the edge of the page. The overlapped flowers that are darker will look like they are further back in the finished piece. The flowers going off the edge of the page looks more natural when there are so many.


I wanted more contrast at the base of the picture so I added a few stems that I cut out with scissors and the final few leaves. I went over the base area with magenta. I knew this would make a dark brownish color so I used a paper towel to blot some of it off. I also added a tiny bit of the pink near the top of some of the flowers where the blue color would make it a purple color. It is barely noticeable.

I couldn't wait to see if it had worked out so I tried to remove one of the butterflies but the paper was too wet and split so I left it to dry.


When it was dry I removed all of the post-its carefully. Some of them were a little stuck around the edges but when I rubbed a little they all came off. You can see where some of the paint has bled under the post-its but I don't mind that look. I thought about doing some pen work around the flowers but decided not too. I like the way it is soft looking so I am calling it done.  

I think this would look good with other colors too. Try to stick with only 2 primary colors, like red and yellow, blue and yellow or red and blue. If you use all three you will make brown. I know I used red at the end but it was very limited and I knew how dark it would go. If you are not sure about your colors, layer them on scrap paper first to see what you will get. Some paints are not as transparent as the Golden fluids are and I chose only the most transparent ones.They do have a few opaques in their range that wouldn't work here.
I encourage you to give it a try, it is a lot of fun and no drawing skills are needed.

Monday, July 14, 2014

Week 6

The theme this week was nature, earth, universe. I liked this theme and found lots of ideas to fill the cards especially using nature.


 Prompt - tag. I sketched a card with some flowers on then coloured it simply with watercolours.


 Prompt - lollipops. Another sketch and watercolour, this time of a lollipop tree.
 

 Prompt - green.  A very quick sketch of limes. They are so easy to draw and colour. A great idea for a beginner.


 Prompt - diagram.  I watercoloured the butterfly from a photo in a book and then added the words.  I like using watercolour on the index cards. It doesn't soak into the paper straight away and allows some movement of the pigment.


 Prompt - kaleidoscope.  I wasn't sure what the image really looked like in a kaleidoscope so I went to a toy shop and looked into one. The one I used had a triangle set up of mirrors so I could see the reflections were 6 sided, not as I thought 8 sided. I folded a piece of paper into 6ths and cut it out like a snowflake. I traced through the holes onto the card and used that as the base for my pattern. It was fun and I will do something similar again in my journal.


 Prompt - the moon.  I used acrylics to paint the background, then traced around a tree stencil. I coloured it with watercolour and added a couple of birds. Simple to do but I love the way it looks.


 Prompt - text.  I sprayed a card with black dye spray (dylusions). When it was dry I sprayed several different colours of mica sprays (moonshadow sprays). I let it dry and then used a white pen to do the writing. It looks very sparkly in person.

I have enjoyed doing ICAD again this year. It has been hard to see all the work that is being produced because there are so many people doing it this time. I look forward to catching up on all the flickr postings in a couple of weeks. 

Tuesday, June 11, 2013

Make art often

 I think all artists should try to make art often. Even if you are not making art to sell, a little creativity each day can spark new ideas that you want to expand on. That is why I like the online classes because they inspire me to try things I may not have thought of.

These cards come from a 21 Secrets class with Kate Crane. It was called Journal Soup. 


 This page is done with sprays, acrylics and cut outs.
 

 Acrylics and collage. The image is one of Alphonse Mucha's designs.


I forgot to add the little red hearts to these angels. They now have them on their dresses. 


Inks and stamps on this page. 


Acrylics and hand made stamps for this one. A little home made collage as well. 


This page is transparent and stitched together. The images are sandwiched in between. 

Another 21 Secrets lesson I have done is with Jodi Ohl.


First we made a journal using an old painting for the cover. This one was my calendar picture a few years ago. Now it has a new home.


This page uses a stencil for the leaves.  The tags were printed and inked then the flowers were painted and cut out before I stuck them on here.


 This page has a tile printed background. I used scrapbooking letter stickers for some of the words. The rest were freehand drawn.  I drew the dragonflies and cut them out for this page.

None of these art journal pages is any great work of art but there are ideas here that could be adapted to larger pieces. I would really like to make a transparent journal.   Maybe soon....