Showing posts with label stamping. Show all posts

Monday, March 11, 2019

Amazing Angelina film

Over the last couple of years I have been going through my stash of things I bought at craft fairs and trying to use a lot of it. I have moved my sewing studio twice so I keep seeing these experimental materials. Late last year I found my pile of Angelina film.

It is a coloured film that is sometimes cut up into shreds and sold as Angelina fibre. I prefer the effects of the film so I decided to experiment with ways to use it.

Angelina when heated will stick to itself. You can heat it with an iron or a heat gun for different effects. I like to set my iron to silk as any hotter makes the film melt too much and go a copper colour all over. If ironing use baking paper or a craft sheet to protect your iron or it will stick. If using a heat gun take it outside or make sure you use a mask to protect your lungs. I usually double it over so it is a little thicker and easier to stitch with a machine. This sample was first heated with a heat gun to make holes then ironed flat.
The heat gun makes the film bubble and shrink as in the sample on the right (single layer). It also concentrates the colour. The sample on the left is the same film but only folded in two and ironed.
You can also layer different colours and iron them together. It will all melt into one large piece of film. On the right you can see the bubbles formed when this sheet is then heated with a heat gun.

The colour of the background you place your altered film on changes the way the metallic colours show up. On dark backgrounds you see more of the coppery colour but on light backgrounds you can see the colour of the film.

 You can also trap the fibres between two sheets of film. Simply lay fibres on one piece of film then cover with another and iron or heat gun it.
 You can also trap other items like confetti sequins and glitter.
Here I have trapped a skeleton leaf between two different colours of film. The pink side was an extra layer of film that I crumpled before I ironed it onto the already trapped leaf. I also turned my iron up a little to melt the pink layer a bit more than usual.

 Another way to apply the film is to crumple it before you join it together. If you crumple it a lot you will get the rough texture you see here.
 It is possible to make impressions in the film using rubber stamps or wooden block stamps. In this sample I mage a multi-coloured sheet of film then inked up a rubber stamp. I placed the stamp ink side up on a hard surface and carefully put the film sheet on top. After I covered it all with baking paper I pressed hard with my iron. The ink makes the design stand out more but you don't always have to use ink.
 Here I have used a borrowed wooden block stamp to make the impression. It wasn't clean so some of the paint came off onto the back of the film. It looks very different on the light and dark backgrounds.
 One of my favourite ways to attach the film to fabric is using fusible web. You can get it with a paper backing (usually called Vliesofix, Bondaweb or Fuse-Under) or without. I prefer the paperless fusible as it is usually cheaper and I never use the paper anyway. Simply layer one piece of fabric, one piece of fusible and one piece of film, cover with baking paper then iron. You will end up with a very smooth metallic fabric.
You can stitch your Angelina to fabric before you alter it if you wish. It changes the way it reacts. When heated it shrinks a bit but if stitched down that doesn't always happen.  This sample was layered then stitched together before I ironed it.
In this sample I laid sari silks on my ironing board then placed a piece of fusible web on top. I covered it with one piece of flat film and one piece of crumpled film. When I ironed it all together it became one piece of fabric. The different colours of silk make the film look multi-coloured.
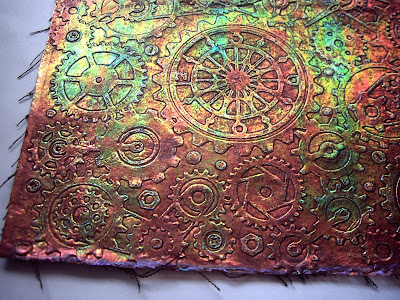
 Some of my more exciting (to me) experiments came later on. This sample was fused to fabric with the iron and fusible web. I then put it through an embossing machine to get quite a well defined embossed metallic fabric. It was bit shiny so I used watered down brown acrylic paint all over it and let it almost dry before wiping it off. This gave a distressed, less shiny look that I really like.
 This piece of fused film was given a coat of crackle medium. When it dried I painted it with white acrylic and again left it to dry. As a final finish I sprayed it with mica spray because it was too bright. Although hard to see in this photo you can see the shiny background through the cracks.

 On another piece of fused film I used a stencil and texture medium to make a pattern. The middle area has the texture medium applied with a palette knife. I also tried a light coat of gesso on the left side that I drew a design in with the end of my paint brush. When dry it was also given a spray to add more colour. All of these medium stuck to the film without any problems so I think you could use any acrylic mediums you fancy.


 After all of these experiments I had a pile of different pieces of film. I stitched them all onto this background and added a lot of detail with hand and machine stitching. It was very difficult to take a photo where you could see the details so I apologise for the bluriness.
 This photo shows how shiny it is.

Wednesday, February 21, 2018

Mixed media textile

This month I am teaching a mixed media textile to the textile group I belong to. This is an idea of what we are going to do.

 I started with a large piece of medium weight white cotton fabric. It doesn't have to be cotton, that is just what I had.


 Next I used fabric paints, stamps and stencils to add pattern all over the base fabric. I didn't worry about perfect prints from the stamps. I wanted some of it to be lighter in different areas.


 After placing the fabric on plastic sheeting, use watered down acrylic paints to paint all over the fabric. I added a lot of water to the paint.


It will stiffen the fabric as it dries. It also tones down the first layer of pattern. Allow to dry completely.


While the paint is drying I gathered the materials I was going to add to my project. I went through my stash and picked out anything that was in the colour range I wanted to use. It is a good idea to choose something to stand out as the focus of the piece. I used the black flowers for my main focus. You could use a printed fabric that you can cut some images from too. I have sheer fabrics, some printed fabric, rusted fabric, lace, felt, sari fabric, plastic bag, ribbon, used dry tea bags and painted tissue paper (an old dress pattern).  You can also use old doilies, antique fabrics and old linens. This is mixed media so anything goes.


 I used a fabric marking pencil to outline the finished size of my piece so I knew how big an area I had to cover.  I tore everything into smaller pieces and laid them out on my background. I left areas of the background visible. I tried to overlap all the pieces a little.


 I find it helpful to cut a hole in white cardboard the size of the finished piece so I can see my design more clearly. I walk away from the work for a few minutes (coffee break) so when I come back I can see the layout with fresh eyes. When I am happy with the design I use a toothpick to apply a tiny amount of fabric glue to the corners of everything to hold it all in place. You could pin or tack it instead.


Now it is time to stitch the piece together. This can be done by hand or machine or both. I start with machine stitching then add hand work later.  I didn't outline all the objects, nor did I only use straight stitch. Anything goes.


 The finished art piece with a few extra embellishments. I added some beads and metal rings.


I also did a second piece using the exact same materials but doing strips of fabric instead of squares. I also added random short, uneven pieces on top of the joins in places. This breaks up the striped effect a bit. The horizontal stripes are wire that I flattened at the ends.


I also did a third piece using those same materials. I had a long piece of the background material left so I added all the other fabrics to it and glued them down as before. I then turned the piece over and used a rotary cutter to cut it into squares. It is best to do this from the back so you don't choose where to cut and it is truly random.


 I took some time to arrange all the squares into a pattern that was pleasing to my eye. You can see in the finished piece below I still changed things around a bit as I started stitching.


I stitched each square separately. Some are machine stitched and some are hand stitched. I added a lot of beads and some metal pieces. I also used Lumiere paints on three of the squares, just painting right over the top of the fabrics and lace.

I have more ideas for this technique that I will share shortly when I have finished them.

Thursday, April 2, 2015

Textured gesso and stamping.

The prompt for this week at DLP was to ride your own unique spirit so I chose spirit as my inspiration. The challenge was to make a custom element so I decided to do a textured background.


I started by laying a stencil over my page and scraping thick gesso over it. You could use texture paste if you wanted to.


After I removed the stencil I used the palette knife to apply more gesso across the bottom and pressed the stencil into it so I would get a slightly different look.


 I used a heat gun while the gesso was wet to make bubbles. Where the gesso is thin you will get smaller bubbles. Here you can see the large bubbles in the thicker areas of gesso. Make sure you do this in a well ventilated area. You do not want to inhale the fumes from the heated gesso. I usually do it near an open window or outside.


At this stage only the top layer of gesso has dried so when you let it cool and then press the bubbles down you get a more textured effect. I then usually let the gesso dry for 10 minutes before continuing. 


Next I used acrylic paint to color the page. I used aqua and white for the top and blended that into a bronze metallic paint at the bottom.


The metallic paint wasn't very shiny so I added some copper colored Viva Inka-gold over the textured area. It doesn't show up in the photo well but it makes the texture stand out more. 


I used bubble wrap to apply green paint to the background for visual interest. I stamped dandelions using stazon ink.


The stamped flower stems were too small so I used a brown sharpie to make them longer. Notice how I didn't make all  the stems reach the bottom of the page. I also wanted the flower centers to be darker so I used the marker for that too. If your stamping doesn't come out dark enough it is ok to go over it with markers. You are in control of your journal. 

I wrote the quote on tracing paper first to make sure it would fit into the space I wanted then used a copper pen to add it to my page. This whole page only took me just over 1 hour to do. It is very typical of my style of clean backgrounds and colors I love.

Tuesday, January 13, 2015

Textured gesso...again

Okay, I know I have shared this technique before but I do like it a lot! The challenge this week for DLP (Documented Life Project) was to use gesso so I went a little crazy with it.


 I started my page with some random book paper glued down with matte medium. Most of it will not be visible so I didn't care which direction the text was in. I use clips to hold my pages down when I am using glue or gesso in journals so it doesn't shrink and curl the page as it dries.


 Next I used my very worn old sea sponge to apply gesso over the book paper. I tried not to cover the whole page because any areas without gesso will stain darker later on. It is a look that appeals to me. I took my book outside and used a heat gun to make the gesso bubble. It adds even more texture than just the sponge.


 I spread gesso through a stencil in a few areas to make even more texture. I was careful when lifting the stencil off so it doesn't smudge.


 Next I used the distress inks to colour the background. I started with the brightest blue and edged the page with the browns.


 The page was a little too bright for me so I decided to spray it with my dye sprays. That was a big mistake. The dyes washed most of the distress ink off and changed the gesso to blue. I quickly wiped the whole lot off with a paper towel. Now I had a mess but I kept going.


I redid the distress inks but I left out the really bright blue this time. In the final image I also added a little green distress ink to tie the images in to the background more.


The final page, almost. I stamped the birds on separate paper, colored them with pencils and cut them out. The are glued to the page with matte medium. I wrote the quote out with a black permanent pen.


I thought the writing didn't stand out enough so I colored in the letters with a green pencil. Now it really is done. 

Wednesday, January 29, 2014

Variety is the spice of life

I do seem to share all sorts of things on this blog and today will be the same. 

Before Christmas I shared the Santa Claus figurine that I made using instructions from one of the Better Homes magazines. I decided he looked a little lonely on his own so I made a Mrs Claus to go with him.  I didn't use instructions this time, just made her the same way and in a similar style. I have to say I really enjoyed having a go at these small sculptures. I think there will be more in the future.


Don't they make a cute couple?

I am also sharing a few more of the cards that I have made for the 52 card challenge

Prompt - postage. As I am trying to make my stash smaller I found a small packet of stamps I could use. I sorted them into colours and glued them to letters I drew and cut out of cardstock. I put one letter on each side of the same card. 


Prompt - artist.  I used the quote "Every child is an artist.  The problem is how to remain an artist when we grow up." I covered the card with gesso and sketched in the image with a brown pencil.  I then used water based markers to add all the colour.  When you use the markers on gesso they stay wet for a while so you can blend them with a makeup sponge.
 

Prompt - journey.  I roughly painted the card with acrylics, blending one colour into the next.  I then stamped the child and waves on.  I used a flower stamp for the sun, using a circle of paper to mask the middle of the flower when I stamped. I then painted it yellow and added some shading with pencil.  The words are from my scrapbooking stash and I used dylusions white spray along the water's edge. 

I am currently doing a mono-printing class that is taking up a lot of my time. I will share some of the finished work later in February. In the mean time I am also scrapbooking at night and have just joined a new art group. I also have a Jane Davenport workshop in a weeks time.  I will I have a busy year ahead but then isn't that the same every year for every one of us. Life is meant to be experienced after all....