Sunday, December 24, 2017

Binding loose journal pages into a book.


Regular readers of my blog will know I love making books as over the years I have shared a few book making techniques. Today I am sharing a video I made recently of the technique I did for my Life Book project in 2012. It is handy when you want to join loose  pages into a book. It is the same hidden hinge method I used in 2012 but I do it a slightly quicker way than I used to so it is a more refined technique these days.


If you want to watch it larger than it appears here go to my You Tube channel where you can view the video larger. I used the technique to finish off my Colour Me Positive 52 week project for this year. I have really enjoyed this project and will continue doing more art journaling next year but I don't know how much I will be able to fit in between the textile projects I want to do.

Here are a few photos from the video to remind you of the steps:

 1. Join your pages together in pairs then glue each pair to the next one to make your book.
 2. Glue a fabric scrap to the spine for strength. Leave to dry overnight.

 3. Make your cover with cardboard and fabric or paper. Ensure the spine is flexible.

 4. Attach the cover and when the glue is dry stitch through all layers to secure the pages inside to the cover. You can use matching thread for stitching or make a feature using glittery thread. It just needs to be a strong thread or even wool. I used 3 strands of embroidery thread.
This is a close up view of the stitching. You could attach beads to the ends of your thread if you like. Thanks for reading my blog and if you have any questions you can contact me via the contact form near the top right of this page or use the comments below.

Saturday, December 23, 2017

The final colour me positive pages for this year.

These are the final two pages for my journal.

 Week 51 was inspired by the old keys my husband gave me. I had to stitch them to the page to make sure they didn't fall off. I made a raised frame for the quote so the whole page had the same level of thickness for my book.

 Week 52 is really the title page for the book. I decided I needed one so this is at the  beginning of the book. I collaged down some printed deli papers to my page.

 I wanted to add lettering that I could doodle inside of so I used a stencil for the letters. Firstly I stenciled the words onto tracing paper so I could see if they would fit and where the best placement would be.
 I used this Deja Vue stencil for the letters. It is a little hard to see here but I used pencil for the outlines. I didn't want to use pen because the surface is a little rough and the pen would have got caught on the textured surface and skipped about.

After I removed the stencil I went over the outline with pen. I was a little easier to control without the stencil in the way. 


Next I used India ink to color in the negative space of the page, blending from one color to the next. You can still see the original background in the letters.  At this stage it is still a little messy.

The finished page. I added lines and doodles around the different colors with a black and a white pen. I felt that this brings the whole page together and it is fun to do. In the next post I will share the video of the journal binding.

Some of the last journal pages for this year.

These are the final pages for my year long journal.

 Week 42 is quite a simple page. I used acrylic paint for the background then added gesso stamped circles. I was in the mood for some doodles so I added the quote and then doodled the night away. It was fun to do.
 Week 43 was a fast page. I had previously glued paper napkins to the background so I used 2 stencils for apply paint. When it was dry I used a gold pen to add a quote.

 Week 44 is a collage over a blue painted background. I colored the rainbow with pencils to make it bolder.
 Week 45 is a collage from painted papers. I already had the flower petals cut out so that was the start of the idea for this one.

 Week 46 is yet another collage. I didn't know I had done so many collages this year. I painted all the leaves with one stroke of paint and outlined them.

 Week 47 was an attempt to be a little more free with my style but it is still a fairly neat and tidy design.
Week 48 was inspired by a picture I saw in a magazine. I just loved the black background that made the colors pop. It too has a lot of doodles. 

Week 49 is a workshop I bought from the Cloth Paper Scissors website. It was called Spirograph designs mixed media.

Week 50 is another collage but this one uses a grid format. I did each part of the grid separately and then stitched them all together on my page. I really love this one and can see I will do more things like this in the future.

I hope you enjoy these shared pages. My next blog post will be a brief demo of a doodle page and then I will share the video of how to put these pages together.

Friday, December 22, 2017

52 week Colour me positive challenge.

I am very sorry that I have not been very prompt about updating my blog this year. My husband has just retired and it has been a huge adjustment for both of us. I will be posting a lot more regularly next year but it is likely to be more textile based projects as that is my main focus now. Today I am sharing a few more art journal pages that I have done for the CMP challenge.
 Week 32 is mostly collage. The boat and waves are collage but the sun is painted on. I do like simple, clean design a lot. Not every mixed media piece of art has to look grungy or messy.

 Week 33 was a doodle page. I used spray inks to create the background then just doodled all over it. I do enjoy this type of mindless doodling.

Week 34 was inspired by a clock I saw when I was traveling. It is painted with watercolour and sketched with a black pen. 

 Week 35 is a tile collage. I cut squares of paper out and stuck them to the page. I added a few other items for decoration and drew on some stitched lines. 

Week 36 is my least favorite page this year. I tried to do a textile collage substituting  paper instead of fabric but I don't think it worked as well as it would have if I had used fabric. 

Week 37 is yet another collage, this time from torn papers. I used a previously painted background. 

 Week 38 was inspired by the photo of the cup of coffee. I challenged myself to use really bright colours.

 Week 39 is not really following the prompt. My husband and I went to a flower festival and I wanted to sketch some of the amazing blooms we saw. I colored them with Polychromos pencils.

 Week 40 was done on flocked paper. It is a type of fuzzy scrapbook paper from my stash. I sketched the shoes on a piece of blue painted paper and cut them out for this page.

Week 41 has paper napkins for the background collage. I then stenciled on paint and added cut out numbers and cheesecloth for texture. I have been enjoying the challenge this year, it has got me painting again. In the next post I will share more pages then I have made a video of how I put these separate pages together into a book that I will share soon.

Sunday, September 3, 2017

Using journal pages as inspiration for textiles

You may remember a while back when I mentioned that some of my journal pages might make interesting textiles. For some recent challenges that is exactly what I have done.


 Several years ago I did this journal page during a Wild Art online class. I loved it so much I have since used it as inspiration for more work.


This was my latest journal page using that same technique of multi colored leaves collaged to a background. This lead me to the following textile page for a Music inspired challenge with my textile group.


I used a fusible web on the back of fabric to make the leaves then ironed them onto my background. The birds were done the same way. They were a sample I did earlier in the year for my silk screen class. I  then added the dark stitching for definition. None of the three designs are identical but they are similar in style.


The next page was one I did recently about what feeds my soul and it fit the Music challenge of my textile group so I did a page based on it.


This one was almost a direct copy of my original design. I love the way it turned out, again I used fabric fusing for the words and background. There is more machine embroidery on this one and some hand stitching for the music.

 The final challenge piece I did was for the theme "doors". I used a photo transfer of a door and used fabric for the architecture. The columns were painted on Evolon and cut out. I did the flowers using ribbon embroidery.

Wednesday, August 30, 2017

Doing my own thing

I am continuing with the Colour me positive challenge but doing it my own way. I always seem to get stuck for ideas if I use someone else's quotes so I usually choose my own quote for inspiration. Sometimes I pick my own theme too.


 Week 27 - the one you love. This week I was pressed for time so I kept it super simple.


 Week 28 - Glitter. I was looking at my colored pencils on my desk and thought I hadn't used them for a while so they became the inspiration for this week's page. I used 'Ice Stickles' for my glitter. At least that way it stays on the page and not on me.


 Week 29 - This weeks prompt was not for me so I did this quote that has been on my pin up board for a while. Sometimes I come across a quote that speaks to me and I save it so I can put it on a page. I wanted to add some mixed media tags so I made them and used my die cutting machine to cut out hearts and butterflies for a papercraft style page.


 Week 30 - I love this quote by Walt Disney. When I used my pencils a couple of weeks ago I forgot how nice it is to use them.  I wanted to do more coloring so this week I made a coloring page then colored it in.


This is the page I drew. If you want to download it for yourself just click on the image to make it larger and right click then save the picture to your computer. You can then print it out onto any type of paper you want and color it your own way. 


 Week 31 - No prompt this week so I drew some of the items that were on my sketching table. I usually sketch while watching tv with my husband in the evening. I collaged on the hearts and flowers for added interest. It was a fun page to do. I am still surprised that I can draw things that I thought would have been impossible ten years ago. Practice really does make you a better artist.

Sunday, August 20, 2017

Fibres West

In July I went to a week long art retreat called Fibres West. It was a fantastic way to mix with other like minded creative people who also love textile art as much as I do. 


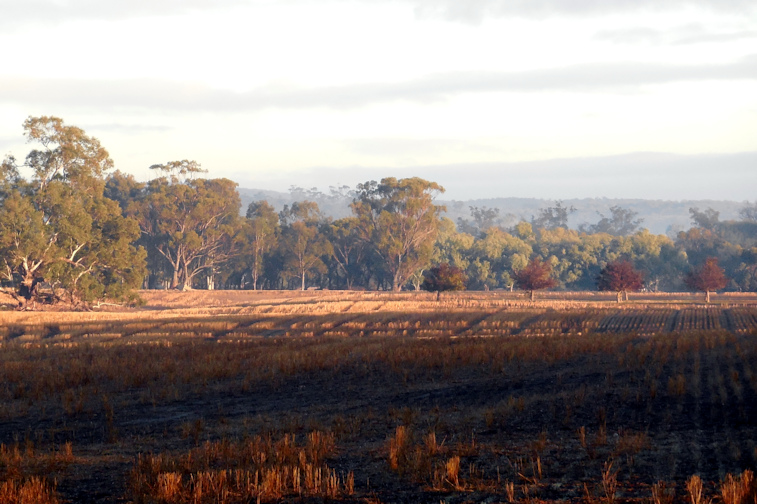
It was held at an agricultural college that is actually a working farm. It is a lovely setting and a great place for taking a long walk but it was freezing cold in the middle of winter. 
 
 My class was using water soluble fabrics to make thread only pictures taught by a wonderful Canadian, Amanda Mccavour. The first few days we did a lot of samples and experiments, then the last three days I did my final project.

 The leaves on the right were originally the same size as the other samples but I had the machine tension too tight so as I stitched it got smaller and smaller. It was a lesson learned.

 Next we trapped pieces of paper or fabric in the layers of stitching. I was tired of square samples by now so wanted to try a bit of drawing with the machine. I did daisies. The blue bits in the petals is mulberry paper and the centers are Japanese paper supplied by our tutor. I later colored the white centers with watercolors because I put it on a white background.
 Another experiment we did was to use shading to make an image appear three dimensional. I enjoyed this lesson and will develop the technique more in the future.

 Amanda does wonderful installations, sometimes using many multiples (4000!) of one shape. She showed us how to do one of her favorite designs that is based on the spirograph. It may look simple but it was very hard to stay on track. I did end up with a bowl shape but it will take a lot more practice to get the stitching even.  

 My final project was to be a bird cage and I decided I wanted to add a couple of birds. This picture shows the sheer fabrics I added before I stitched the birds. I didn't want the black cage to show through them so that is why I added fabric.


 My finished piece turned out the way I wanted it to. I used some patterned plastic bag on the cage. It wasn't as stiff as I would like so later on I did add more stiffening to the piece.

  Our wonderful tutor Amanda is center front wearing the green jumper. I am standing at the back right in a purple jumper trying to keep warm, lol. You can see a lot of the work of the class on the wall behind us. It was a superb class and wonderful week.

 I later added the daisy sample to a journal page to go into my fabric art journal later this year.

 I have used beads to raise my birds off the white background here so it could be displayed recently. That worked well but I am going to stiffen it properly soon so it can be framed and hung proudly in my home. I like the way the shadows are on the background and want to play on that. The possibilities of this technique are endless.