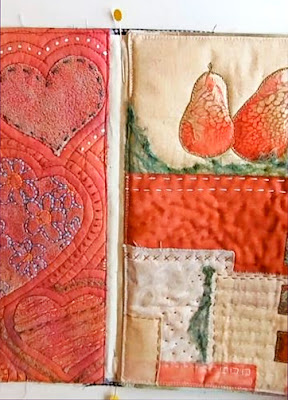
I start with a bunch of finished pages. It needs to be an even number of pages. Use any technique you want to make your pages and finish off the edges neatly. Some methods I used for edges were folding over excess fabric to the back, binding, leaving felt untouched or satin stitch. I like all my pages to be the same size and I make them letter size (A4 metric) because that is easy to handle under my sewing machine.
I place a strip of fabric between the first and second pages. It doesn't matter how wide you make it but I like it to be almost the length of the pages. I match the outer edge of the pages and pin them first then pin the fabric strip in place. Stitch all the way around your two pages to hold the strip in place and connect the first two pages together.
I place the third page on top then pin the extra piece of fabric strip to it. I add the fourth page and matching up the outer edge again I pin it in place. I stitch all the way around the two new pages and catch in the fabric strip.
This makes a 4 page signature that is connected by the fabric strip in the middle as you can see here. At this stage it is very sturdy. Do that to all your pages so they all become grouped together. Next we will make the spine and attach it to all those 4 page signatures.
I stack my pages and measure the width I want the spine to be. I also measure the length of the pages for the length of the spine. I cut that piece out of stiff interfacing (stiffener or vilene etc). I cut a piece of fabric to attach the spine to and also allow some excess fabric that will be inserted into the cover to hold it on. I fold over the ends for neatness.
I pin the interfacing part of the spine, close to one edge, to the fabric strip connecting the pages of the first signature. I make sure it is pinned straight before I stitch it in place.
The stitched signature. After the first one is attached I then add the rest, one at a time, making sure I line up the top and bottom edges so the book is square.
When all the 4 page signatures are attached to the spine the inner part of your book will be complete and all you have to do now is attach a cover to that excess fabric strip.
I pieced my cover together here but usually I do it with one piece of fabric. This shows the interfacing applied to the fabric cover, heavy stiffener front and back but light stiffener on the spine area. I did the cover interfacing the same size as the pages. The cover fabric I measured by wrapping the material around the closed book. Do not open the book flat and take a measurement because it will be too short for the book to close.
I stitched the inside cover, just a plain piece of fabric, right sides together to the cover then folded it out to hide the seams. Here I have folded out one side only so far.
The completed cover with both sides folded out. You can see the inside edge of the inside cover is folded under for neatness.
I pinned the excess fabric from the stack of connected pages between the front and inside covers then stitched it all together. I tried to get the inside cover edge as close as I could to the first page, Leaving just a small gap of the spine showing.
Next I pinned the back excess fabric strip into the pocket between the back cover and inside cover. I stitched that together and then book is finished. At the end of the third video I shared the binding method of attaching a cover. Here are a couple of closeups of that binding.


